
In this DIY tutorial, I’ll walk you through the step-by-step process of building paver steps.
This is a perfect project to transform your backyard patio or to offer to your customers for a solid profit. This easy-to-build design utilizes concrete blocks with pavers on top to complete the look.
That means it’s low-cost and looks great.
I’ve put together the most thorough and clear guide I could, so let’s jump right in.
Contents
- Video tutorial – How to build paver steps (above)
- Diagram of basic construction
- Tools and materials needed
- Written tutorial
- Cost breakdown vs. hiring a contractor
- How long does it take to build paver steps?
Paver Steps Construction Diagram

The diagram above shows a side cross-section view of paver steps built on top of concrete blocks. This system will work for stairs up to 18″ tall, since that is the limit for the paver base panels.
First, you have the geotextile fabric (yellow) laid on top of compacted soil that is graded at a 1-2% grade away from the house. Then a half-inch layer of sand and the Paver Base Panels on top of that. The retaining wall blocks and pavers are set directly on the panels, which is convenient because the base is the same for both the stairs and the patio.
Another benefit of this system is that drainage is built in. By grading the soil and building on top of that, the entire stair system is sloped between 1/8 and 1/4 of an inch per foot. That means no special drainage is needed.
You’ll also notice a packed gravel base between the concrete blocks that form the stairs. This is much cheaper than the concrete blocks, so using it wherever possible is a good idea.
You’ll also notice the 1/2″ gap between the house and the stairs. This is achieved by building a relief wall away from the house so the stairs are not supported by the wood of the house and do not cuase moisture damage.
The stairs are locked together with concrete adhesive. All materials are listed and linked below.
Essential Equipment – Tools and Materials

Tools
- Landscaping rake
- Spade shovel
- Flat nose shovel
- Digging bar (only needed for hard-packed rocky soil)
- Pickaxe (optional)
- Wheelbarrow
- 4′ Level
- Line Level (optional)
- Mason line (optional)
- Measuring tape
- Rubber mallet
- Masons Chisel
- Hand tamper or plate compactor
- 6′ screed board (a straight 2×4 works just fine)
- Wet tile saw (optional but nice to have – you can rent one)
- Cuttoff saw with water feed (essential for curved cuts – you can rent one)
- Angle grinder (helpful for smaller, more detailed cuts)
Safety Equipment
- Gloves
- Eye protection
- Earplugs
- Knee pads
- Respirator
Materials
- Concrete paver (See below for what I used)
- Retaining wall blocks (see below for what I used)
- Flashing Tape
- Aluminum Flashing
- Concrete Adhesive
- Paver Base panels
- High-quality geotextile fabric (rated for at least 30 years)
- Garden staples (for fabric)
- Leveling sand (1 50lb bag per 12 sq feet of area)
- Fine jointing sand (or polymeric sand)
- 1/2″ rebar
- Edge restraint
- 10″ landscaping spikes
Pavers used for this project:
- Brand: Belgard
- Color: Riviera
- Style: Cataline Grana – A mix of 6×12, 9×12, and 12×12 inch pavers.
Concrete blocks used for this project:
- Brand: Belgard
- Color: Riviera
- Style: Melville Wall (4″ x 20″ x 10″)
Building paver steps (step-by-step)
Step 1 – Planning and designing your stairs

You’ll want to determine the following:
- Total rise of your stairs measured in inches (from the ground to your patio door threshold)
- Number of stairs needed (Divide the total rise by 7)
- The rise of each stair
- Landing size (if you are including a landing)
- Footprint dimensions of your stairs
- If you need a railing (only if you have more than three steps or 30″ total height)
- Which pavers and blocks you plan to use – The thickness of the retaining wall blocks you use will determine the rise, or height, of each stair, so select a block that will give you a rise between 6″ and 7.75″.
This part of the project requires some time and careful consideration. I recommend sketching your stairs on paper with all dimensions so you can reference that drawing during the build.
Step 2 – Choose a base material
There are two methods you can use for your base. You can either use a 6″ packed gravel base to install the blocks on top of, or paver base panels.
If you are also building a patio, then the paver base panels will save you a LOT of digging, and it’s well worth the additional expense.

If you are only building stairs, then a packed gravel base may be easier because it’s fewer steps. You need to dig deep enough to install a 6″ layer of gravel below the bottom layer of retaining wall blocks and stack your blocks directly on that packed gravel base (as shown in the above image). I demonstrate how to do this in my tutorial on building a retaining wall.
Step 3 – Grading and Preparing Your Base
Grading is essential. If you build your stairs perfectly flat, water will not drain properly and could cause serious issues. So, you’ll want a 1-2% grade on your stairs so the water drains away from your house. That means for each 1′ of distance from your house, your stairs will slope down between 1/8″ and 1/4.”
Example: Let’s say your stairs are 4 feet deep, meaning they stick out away from your house by 4 feet. The ground will be between 1/2″ and 1″ lower on the side furthest from your house.

This slope will be built into the base that you make. So, if using paver base panels, the slope will be built into the ground, so each layer you lay on top of it will also be sloped. If you are using a packed gravel base, the top of the gravel base will be sloped, so when you build on top of it, the stairs have a slope automatically built in.
To build the base using paver base panels, follow the instructions from my tutorial on building a paver patio. Here’s a brief overview…
- Dig to the appropriate depth and pack the soil well
- Lay a high-quality geotextile fabric

- Install a 1/2″ layer of sand
- Install the paver base panels on top of the sand


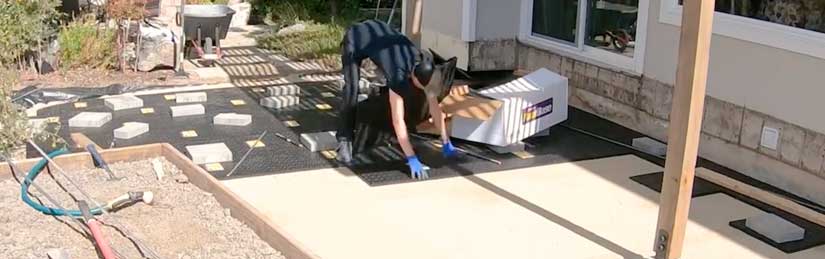
Step 4 – Installing the First Row of Blocks
Snap a chalk line parallel to your foundation to use as a guide for laying your first row. I recommend designing this strategically to avoid any unnecessary cuts. For example, you may decide to make your stairs a couple of inches wider to avoid cutting some blocks. Well worth the effort since cutting these bad boys is not fun.
 Then, you can start placing the blocks for your stairs. Pay attention to ensure the blocks are level side to side and even with each other as you go.
Having a rubber mallet on hand is helpful for making small adjustments and setting the blocks in place.
Step 5 – Installing an Edge Restraint
 If you are using a gravel base, the edge restraint isn’t required. Instead, the bottom block needs to be buried by at least 4-6.” So instead of an edge restraint, you’ll just pack some gravel or dirt around the blocks to secure them in place.
If you are using paver base panels with a patio, then the patio will lock the concrete stair blocks in place. However, if there are any sides of the stairs without a patio, you’ll need an edge restraint.
Secure the edge restraint using 10″ landscape spikes.
Step 6 – Packing Gravel Between Blocks
 Now, pack some gravel base material between the blocks on our stairs. You’ll be building a relief wall that is spaced 1/2″ away from the foundation of your house. So, you’ll want the packed gravel to be between the bottom block and your foundation as well, to prevent it from migrating toward your home during the rest of the installation.
Add the gravel in 2″ layers and pack thoroughly as you go. Once the gravel is close to the top of the first row of blocks, you can move on to the next step.
Step 7 – Prepare and Cut the Siding (optional)
 You don’t have to cut the siding, and if you have brick or stucco, you probably won’t want to. However, if you have wood siding, the stairs will look cleaner if you cut the siding, as it will allow the stairs to be closer to the house without a noticeable gap.
To do this, stack your blocks to mimic the finished stairs, then mark the siding where to cut so that it creates a perfect outline of the stairs with a 1/8″ to 1/4″ space all around.
Then, cut the siding. You can use whatever you like here, but an oscillating multi-tool is very easy.
Then, add flashing behind the house. You’ll need two layers: one is a flashing tape, and on top of that, a metal flashing, such as galvanized steel or aluminum. Ensure the flashing above it overlaps the new flashing so that water moves away from the house if it happens to get behind the siding. Shoot for a 6″ overlap.
Step 8 – Installing the Next Layers of Blocks
 Get a high-quality concrete adhesive (link above) and apply it generously to the bottom layer. Then, place each stone carefully so that the joints between the blocks are staggered. Staggering the joints between layers is essential for stability.
Clean the blocks before gluing; otherwise, the adhesive will be ineffective. Also, pay attention to their placement to make sure they remain straight. Until the glue dries, they can move and shift easily.
Once the second layer of blocks is glued, pack some more gravel base between any gaps (except the gap between the house and the relief wall).
Continue gluing the blocks in place and packing the gravel in between until the stairs are complete and ready for the pavers to be placed on top.
Step 9 – Installing the Pavers
 And finally, install the pavers on top of the concrete blocks to finish the stairs. You can also use other materials here. Bluestone is a common option. A stair cap with a finished edge is another good option.
Either way, the process is the same. Dry fit all the pieces, make any necessary cuts, and then clean the surface thoroughly before gluing with a high-quality concrete adhesive.
 However, there is one more step you’ll want to complete. Since pavers have spacers on the side, you’ll want to cut those off wherever the edge of the paver is showing (along the nose of the stairs). You can easily shave off those spacers with a wet tile saw before gluing the pavers in place.
Step 10 – Adding Jointing Sand
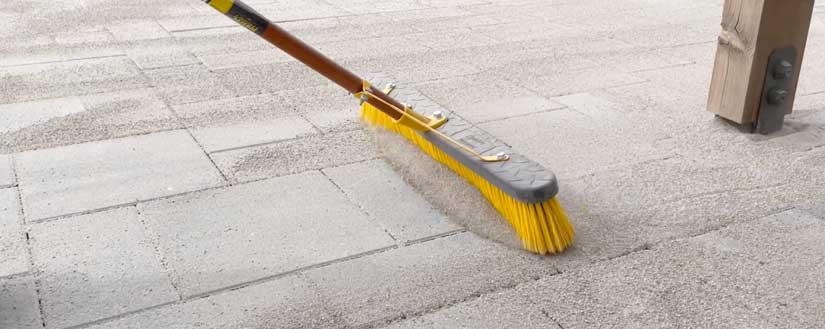 The final step is to add jointing sand in the joints of the pavers. This is the same process as described in my paver patio tutorial. Simply follow the directions on the bag and you’re paver steps are ready to go!
Costs to install these paver stairs:
I installed these stairs in 2023, and the total cost was approximately $1,600. Here’s the breakdown:
- Concrete Blocks: $1,268.10
- Pavers (27 sq. ft): $134.49
- Paver Base Panels: $70.21
- Aluminum flashing: $38.56
- Concrete adhesive: $32.41
- Gravel: $24.25
- Sand: $15.09
- Flashing tape: $5.50
- Geotextile fabric: $9.74
- Edge restraint: $6.29
The majority of that was the cost of the concrete blocks. These are significantly more expensive than the pavers.
I researched what a contractor would typically charge for this project, and the estimates I found were approximately $5,500, which seems reasonable. I’m sure many will charge triple that price, and some handymen with terrible pricing strategies will only charge $2,500, but I think those would be hard to find.
That means I saved a total of $3,900 on these stairs alone.
Considering that I saved at least $10,000 on my paver patio, that is a substantial savings, especially since most DIYers could handle this project.
Also, this would be an excellent service to offer to customers as a professional handyman or contractor. Just show them this video, and your sales are done for you!
How long does it take to build paver steps?
If you worked efficiently, you could tackle this project in about 20 hours. You’d need approximately five hours to plan your design and shop for materials, followed by about 15 hours of labor to complete the work.
However, for most people, I would expect it to take longer than that. It’s probably safe to allow yourself about 30 hours to complete the project, and be prepared to take longer if necessary. Never rush these projects, as it ruins the fun, stresses you out, and often leads to a painful back.
But if you take your time, you can enjoy it.
Turn your DIY skills into a profitable side business and make over $100 per hour.

Home repairs and improvements are in high demand, and there aren’t enough service pros to fill that demand.
This is a massive opportunity for any handy person who enjoys helping people.
If this sounds interesting to you, I recommend reading this free report.
You’ll learn ten profitable services you can offer TODAY without a contractor’s license.
Then, I’ll send you more information about what it takes to build a profitable and enjoyable handyman business.
FREE REPORT: 10 Profitable Handyman Services You Can Offer WITHOUT a Contractor License


